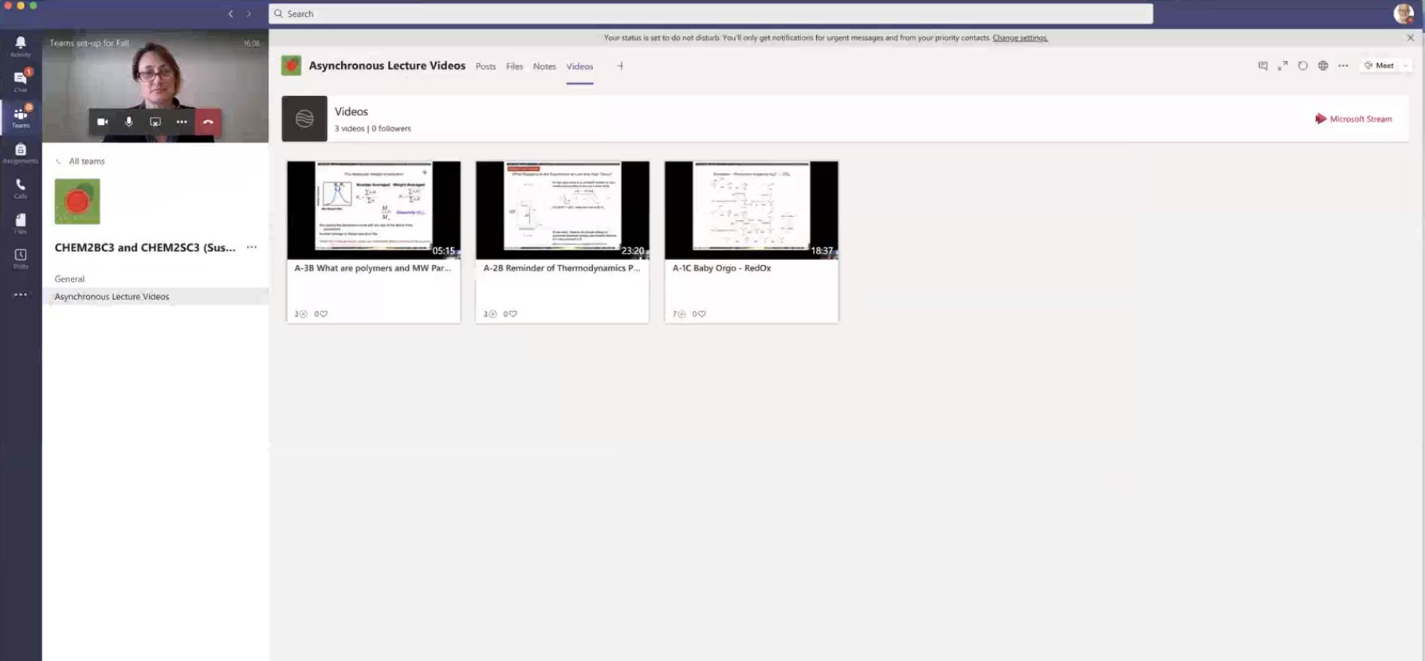
Integrating your Stream recording into Teams
Overview
- UTS does not recommend connecting Stream to Avenue to Learn as it requires students to be logged into 365.
- Instead, keep Teams recordings within the 365 environment for an organized and seamless student experience.
Instructions
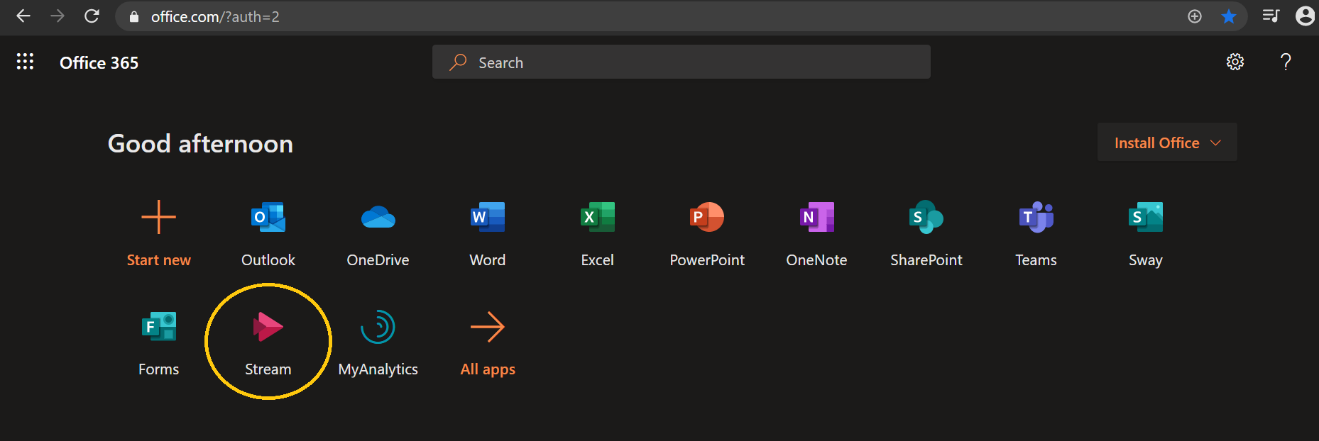
Step 1: Go to office.com
If you have not already, log in with your MacID and password to access your Microsoft 365 license.
Step 2: Select “Stream” from your apps
If you do not see Stream, click “All apps” for a complete list of available apps.
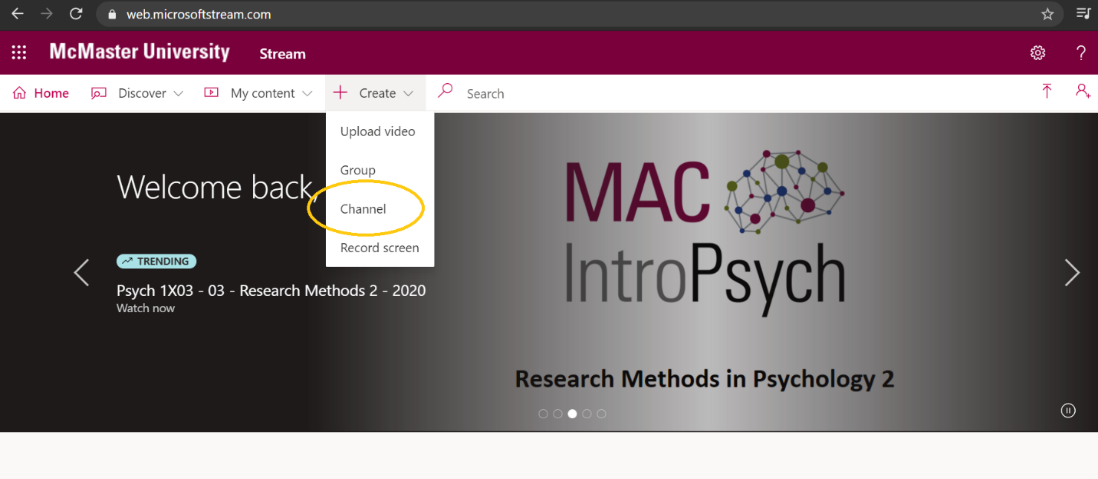
Step 3: Navigate to “Create” and select “Channel” from the drop-down menu
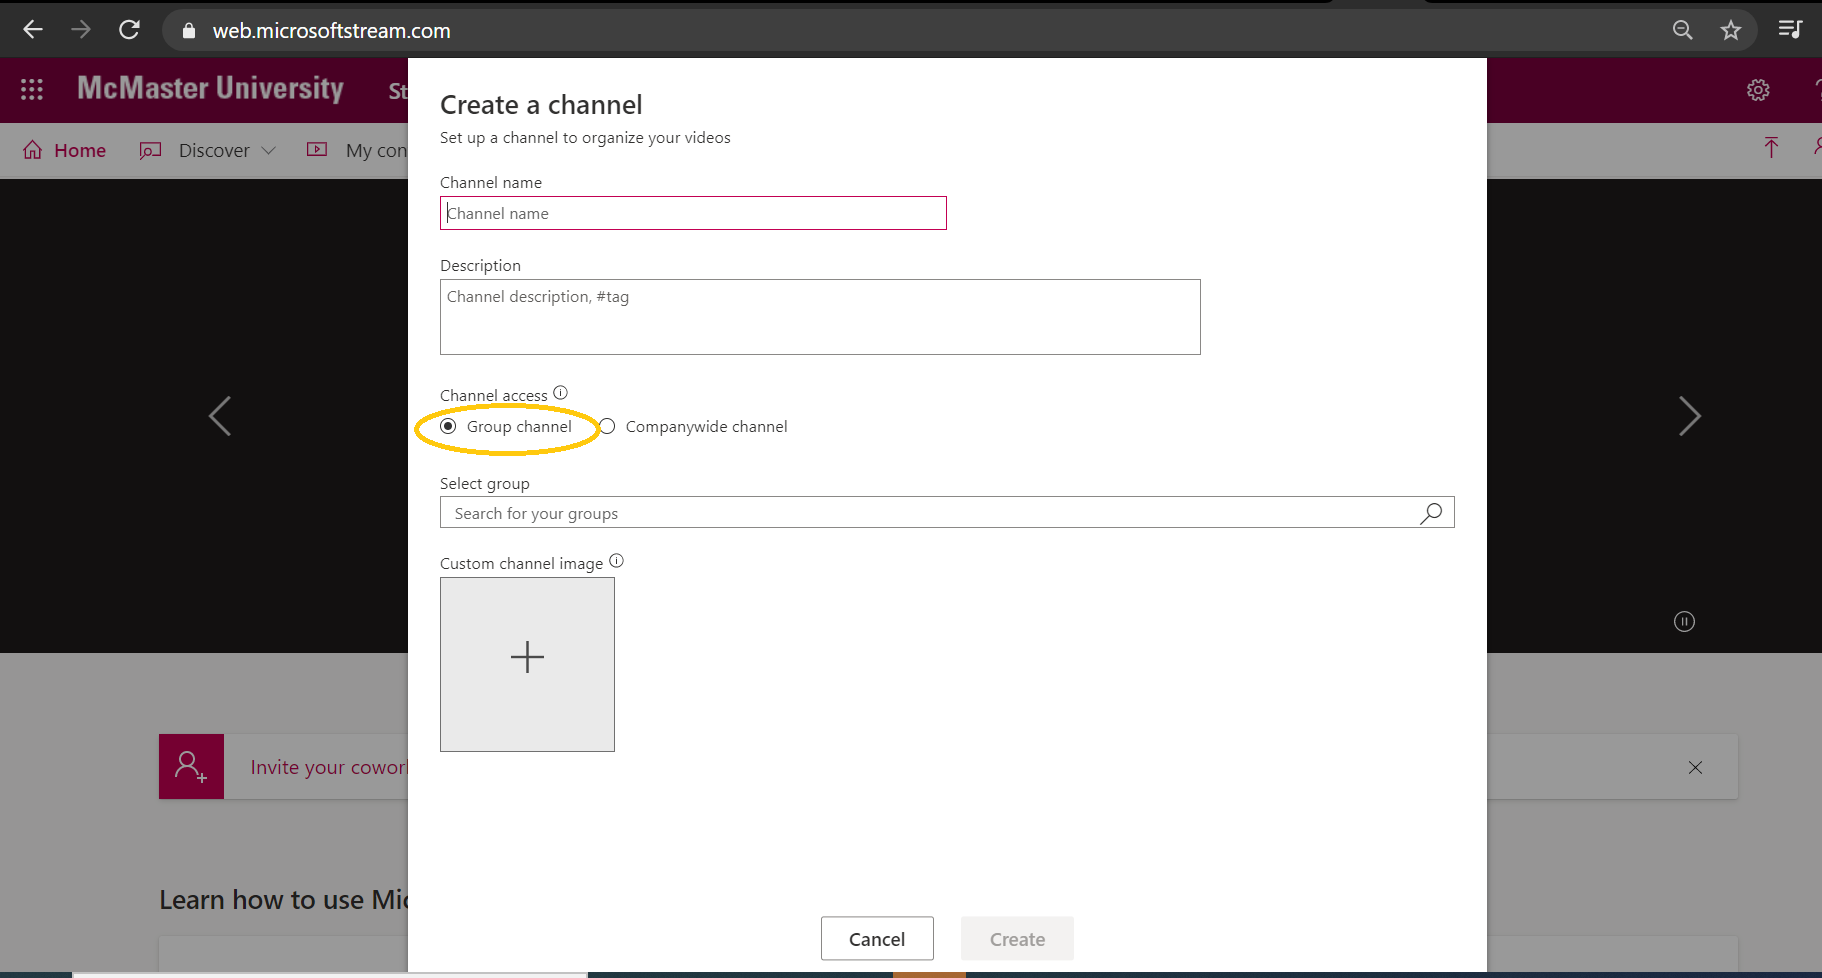
Step 4: Create your channel
A pop-up window will give you fields to fill out the name, description, permissions and custom image for the channel. Under “Channel access,” select “Group channel,” then use the “select group” field to search for the Team name you want to give permission to. At the bottom of the pop-up window, click “Create.”
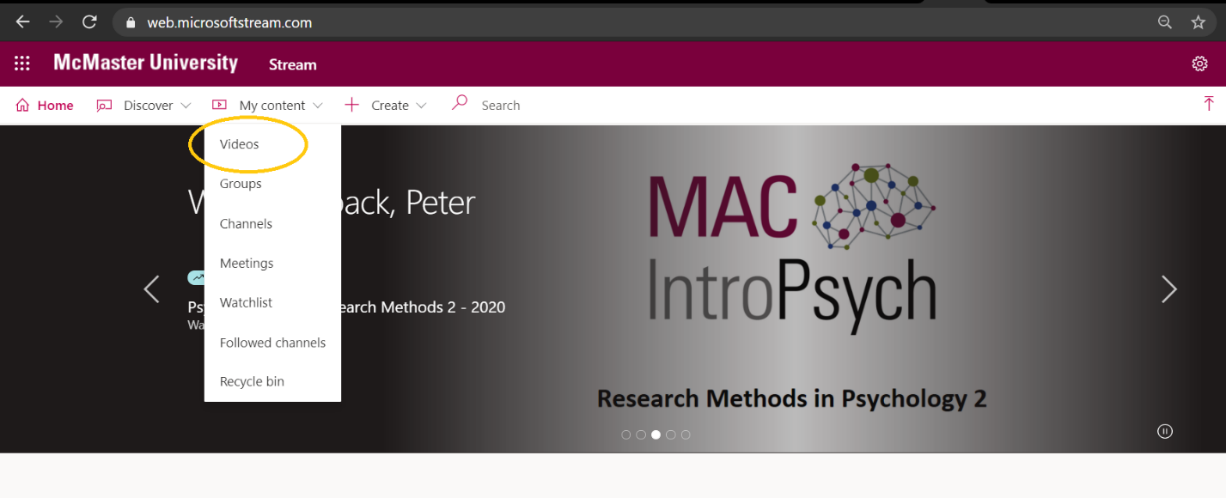
Step 5: Populate your Stream channel with videos
Navigate to “My content” then select “Videos” from the drop-down menu. This page will show your recordings from meetings and calls.
On the right-hand side, select “Add to group/channel.” A pop-up window will then allow you to link this video to a Stream channel. Under “Share with,” select “Channels.”
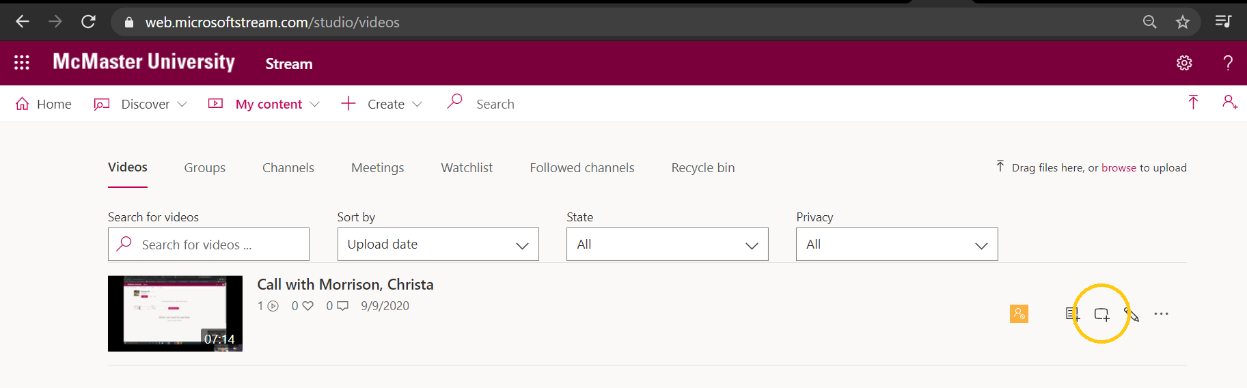
The field to the right will allow you to search for your channel. Note: this only allows users to see the video and cannot delete or modify it. At the bottom of the pop-up window, click “Save.”

Step 6: Open your Team
Navigate to your Team and select the channel you wish to connect to the Stream video.
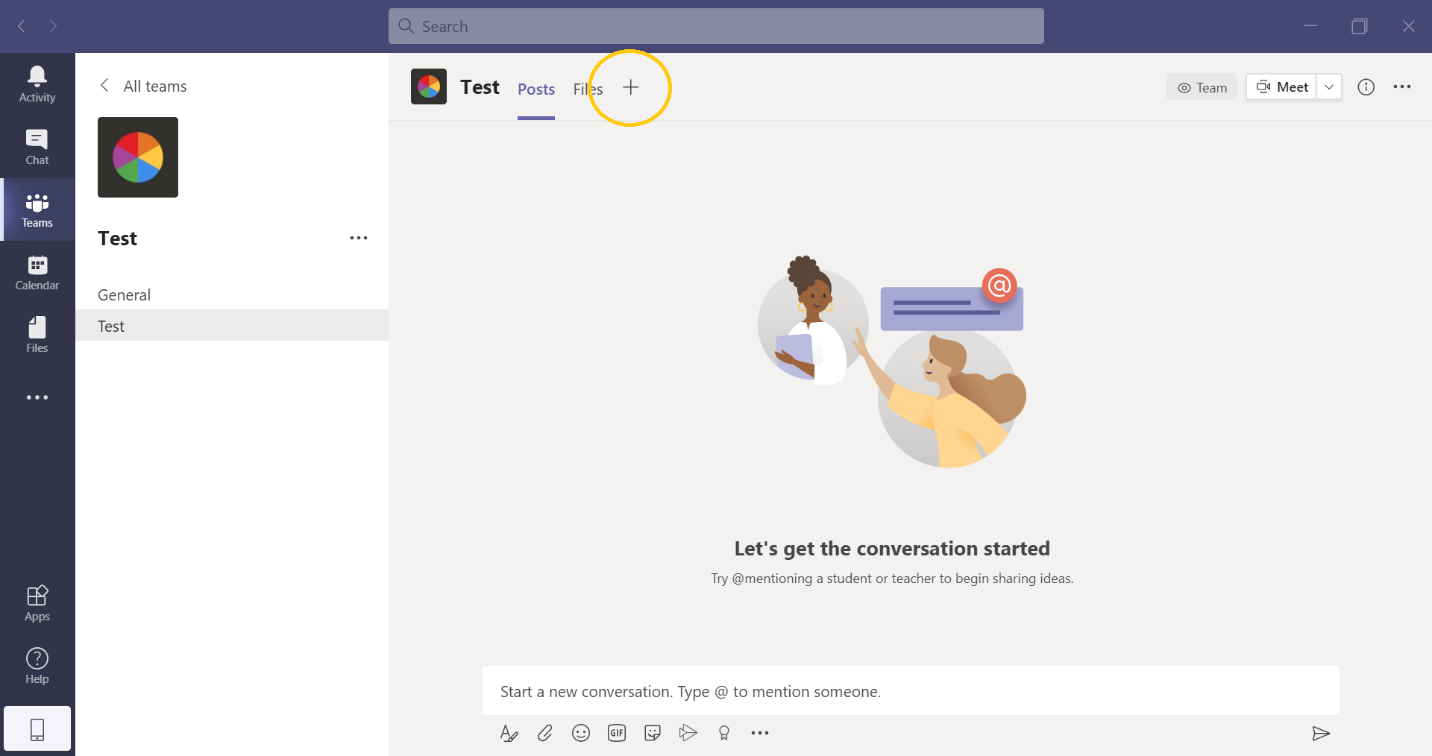
Step 7: Add Stream to your Team
At the top of the channel, click the “Add a tab” button, then select Stream in the pop-up window.
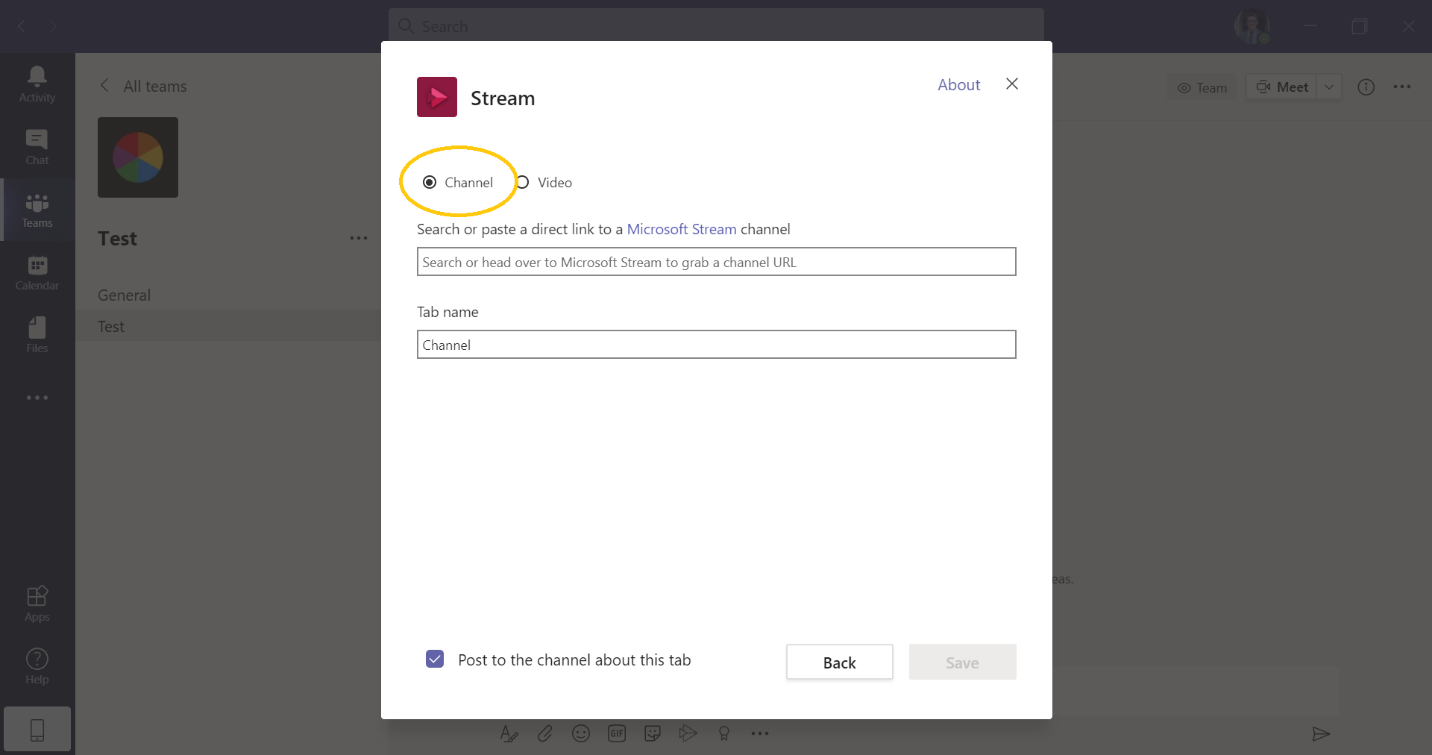
Make sure “Channel” is the selected option, not “Video.” In the search field, you can either search for the channel by name or paste the Stream channel URL. At the bottom of the pop-up window, click “Save.”
Following these steps will connect the Stream videos to your Team tab.