Get started
Information Box Group

McMaster Mail Licenses View license types
McMaster Mail is the email and calendaring service for many groups across the University. Learn more about what 365 integrations are available to each group.
McMaster Mail Licenses - View license types
McMaster Group |
License Description |
| Staff, Faculty, Researcher | Suite of licensed applications with download capability |
| Contractor, MACID Email, NONMacSup, Upd Inst | Suite of licensed applications without download capability |
| Retiree (except professors emeritus) | Exchange Online (McMaster Mail email with web access only) |
| Professors Emeritus | Suite of licensed applications with download capability |
| Role-based accounts | Exchange Online (McMaster Mail email with web access only) |
| Medical Student | Suite of licensed applications with download capability.Includes Exchange Online |
| Person of Interest (POI) | Suite of web applications without download capability |
Accessing Email on Your Devices See recommendations
Recommended settings for accessing email via the web browser or email client on your PC, Mac, or mobile device.
Accessing Email on Your Devices - See recommendations
Accessing McMaster Mail via web browser:
You can access McMaster Mail via most web browsers, including Internet Explorer, Chrome, Firefox, Edge, and Safari. The URL to access your new email service is http://mail.mcmaster.ca/.
Recommended versions of Outlook on your PC or Mac:
McMaster University provides email and calendaring services to retirees via web browser, however individuals may use their own software to access email as well.
If you would like to access your McMaster email via Outlook software on your PC or Mac, it will be important to use Outlook 2013 (at minimum) for the best functionality. If you have Outlook 2013, your software should function well, however McMaster recommends using the web browser version in this case.
Please see step-by-step instructions here on how to check what version you have (based on your type of device).
Recommendations for mobile and other devices:
| Device | Recommendation |
| Android | |
| Apple iOS |
|
| Apple Mac OS X |
|
*Note: earlier versions may work, but are not recommended by UTS.

McMaster Mail Benefits Learn More
Learn more about benefits and features of McMaster Mail.
Benefits
- Increased Storage (50GB)
- Reliable integration with mobile devices
- Enhanced security
Setup instructions Retirees
Instructions to add McMaster Mail to your mobile device or laptop are listed below.
McMaster Mail setup on Windows & Mac
Instructions to access email on Windows device
1. Open Microsoft Outlook Client to access your email. You should be able to access the inbox with no issues.
2. Depending on your outlook version, you may receive a pop window that prompts you to sign into your Microsoft Outlook account using your MacID and password:
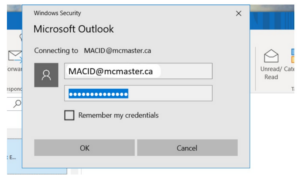
If this happens, remove the user account and replace it with your macid@mcmaster.ca.
*Make sure to check “Remember my credentials”.
3. You may have to relaunch your Outlook client for any emails to update.
To add another account:
1. Open Outlook
2. Click File > Account settings > Account settings
3. Click Add Account and follow the prompts
Instructions for adding Outlook to Macintosh
Outlook Setup for Mac (First Time Ever)
1. Open Outlook.
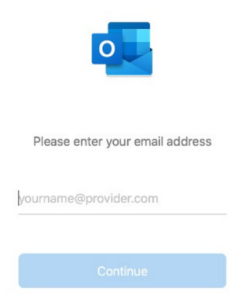
2. Type in your email address (“macID@mcmaster.ca”). It will connect to Office 365 service.
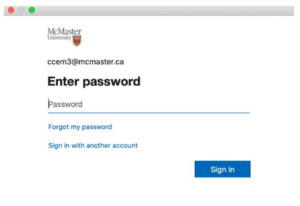
3. Another window will pop up prompting you to enter your password (it will have a McMaster University logo on the top left side).
Outlook Setup for Mac (Add Additional Accounts)
1. Open Outlook
2. Select Tools > Accounts
3. At the bottom left corner of the window, click on (+) sign > New Account
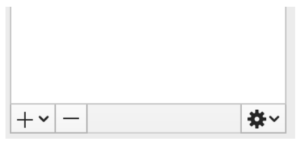
4. Follow the same steps to add account info as if you’re adding a new account
Instructions to add McMaster Mail to MacOS Apple Mail
To add your new McMaster Mail account:
1. Click on Mail > Add Account. Select “Exchange”.
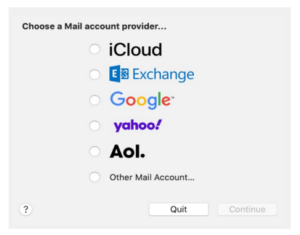
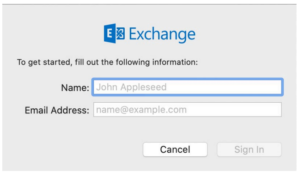
2. Enter your name and email address (macid@mcmaster.ca), and select Sign In.
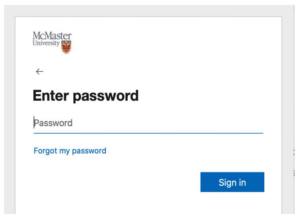
3. In the next screen, you’ll be prompted to enter your McMaster University password. Enter it and press “sign in”.
Add McMaster Mail to iPhone & iPad
Instructions for adding email to iOS Apple Mail
To add an account:
1. Go to Settings > Passwords & Accounts.
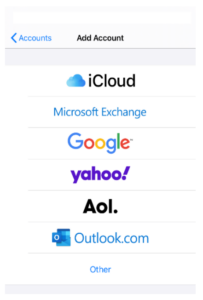
2. Tap Add Account, then select Microsoft Exchange (or Exchange depending on the version you have).
3. Enter your email (Your macid@mcmaster.ca) and description. Then click Next.
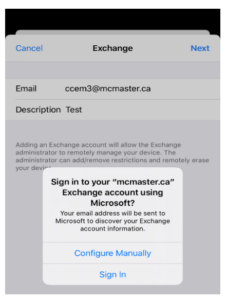
4. A new window will pop up. Tap “sign in.”
5. Enter your password, and press “sign in.”
6. Finalize by selecting the Contacts option if you want it (toggle to green) – you may get a message to keep previously saved Contacts on your phone. Choose your preferred option.
7. Select Save.
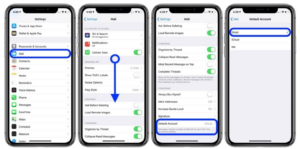
To make an account default: (Optional)
1. Open Settings
2. Swipe down and tap Mail
3. Swipe to the bottom and tap Default Account
4. Tap the account you’d like to use
Instructions for adding Outlook to iOS
To add an account:
1. Download Outlook for iOS from the iOS App Store.
2. Type in your email address (“macID@mcmaster.ca”). It will connect to Office 365 service.
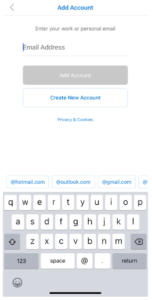
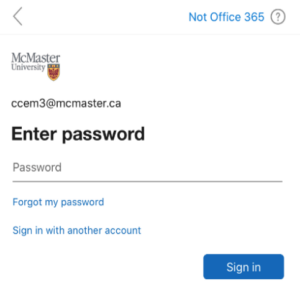
3. In the next screen, enter your password (it will have a McMaster University logo on the top left side).
Instructions for adding McMaster Mail to iPad
Please note that some screens may be different depending on iPad version.
1. Open Settings
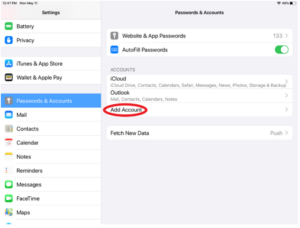
2. Select Passwords & Accounts, Select Add Account
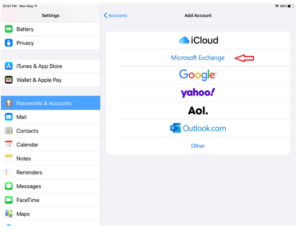
3. Select Microsoft Exchange
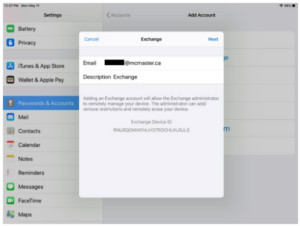
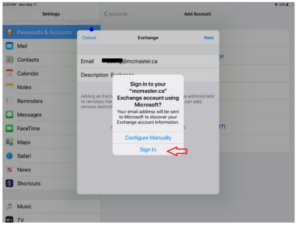
4. Enter your macid@mcmaster.ca, Click Next
5. Select Sign In
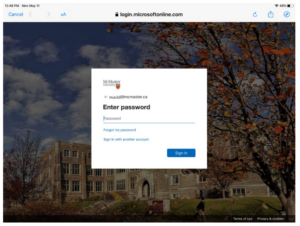
6. Enter password, Click Sign In
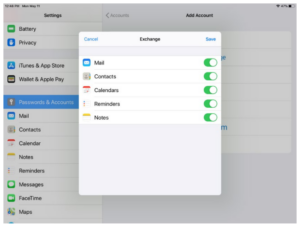
7. Select items you want included on your iPad for your McMaster Exchange account (not all apps are required). These items include:
- Contacts
- Calendars
- Reminders
- Notes
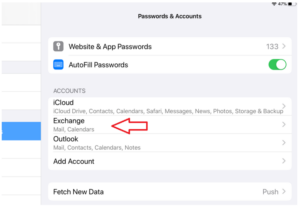
8. Account has been added
Add McMaster Mail to Android Phone
Instructions for adding McMaster Mail to Gmail App
1. Remove your existing McMaster email account if applicable.
2. Open the Gmail App.
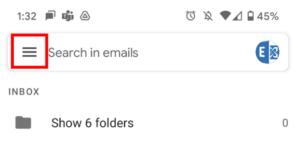
3. Click on the Menu icon in the top left-hand corner.
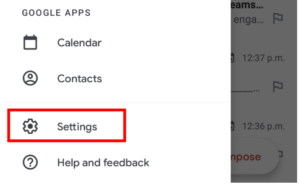
4. Click on Settings.
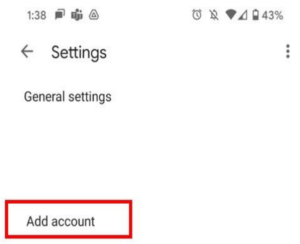
5. Select Add account.
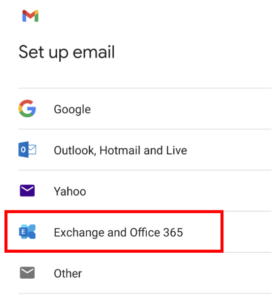
6. Select Exchange and Office 365.
7. Enter your McMaster email. i.e., smithj@mcmaster.ca and click next.
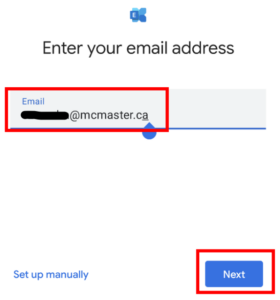
8. Enter your MacID password and select Sign in.
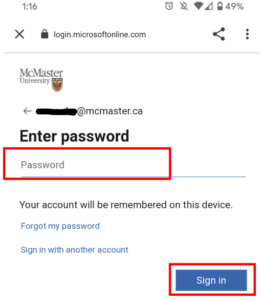
9. If you have Multi-factor authentication setup, you will be asked to authenticate the login. For more information about MFA, visit https://office365.mcmaster.ca/mfa/
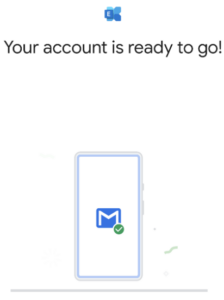
10. You are all set! You should see the ‘Your account is ready to go!’ message and can use view your McMaster emails in the Gmail app and calendar entries in your Google Calendar.
Instructions to set up Outlook App for Android
1. Download and install the Outlook App from the Google Play Store. Depending on your Android version, the name of the app may be bit different.
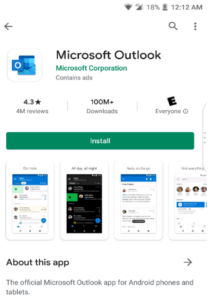
2. Open the Outlook App from the list of applications.
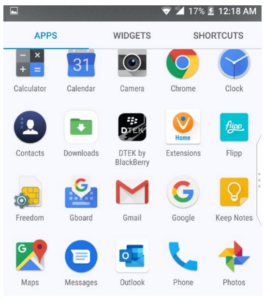
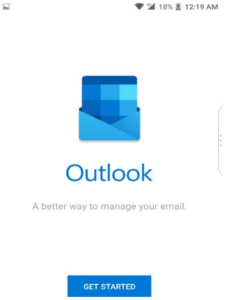
3. Click ‘Get Started’.
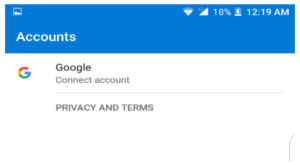
4. Go to ‘Accounts’ and ‘Add Accounts’.
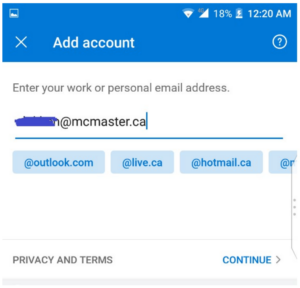
5. Enter your McMaster Email Address (‘MacID@mcmaster.ca’) and Click ‘Continue’.
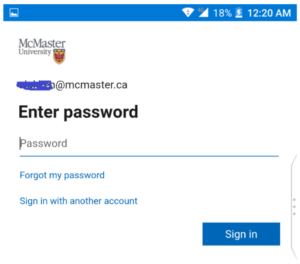
6. Enter your MacID Password and click ‘Sign in’.
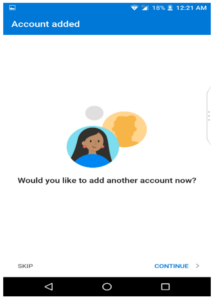
7. ‘Account added’ message is displayed. Click ‘Skip’.
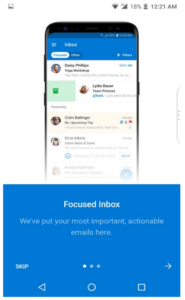
8. Click ‘Next’ to go through the Tips or click ‘Skip’ to access your Inbox.
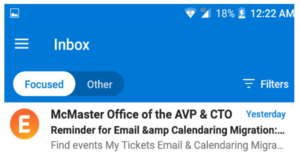
9. Your Inbox is displayed.
Instructions to update email settings on Android
These steps only apply if your McMaster email was on your mobile phone Outlook app before migration or if you are prompted to re-enter your password.
1. Open the Outlook App and a prompt will appear telling you to re-enter your password.
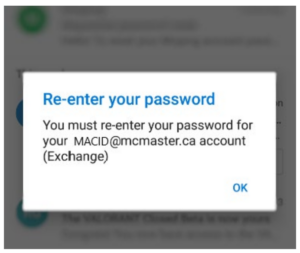
2. Tap OK and change the settings using the following information:
- Server: outlook.office365.com
- Domain/Username: Your MacID@mcmaster.ca
- Description: Work
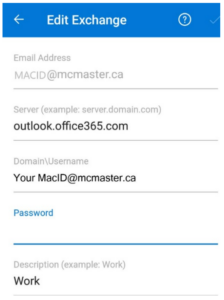
3. Once all fields have been filled (including password), tap the checkmark in the top right of the screen.
4. Close and reopen the app. Your email might take a few minutes to sync before you can open the mailbox or see all mail.
Is macmail.mcmaster.ca not working?
Video Training
Please see below instructional training videos on key features of McMaster Mail, specifically developed and curated for retirees.
How to access your email service via web browser: |
How to use the ‘Focused Inbox’ feature and turn it off: |
IT Support
Need technical support to access McMaster Mail?
Visit the ‘Contact Us’ page on the UTS website to utilize the live chat, phone number, or to log a service ticket.
If you have any questions, or are unable to resolve your issue, support can be received via the Service Desk
